![]()
Introduction
I recently bought a new computer where I wanted to create virtual machines to try out new DevOps tools and AI models in separated instances. To do so, I decided to try out a virtualisation hypervisor called XCP-ng
What is XCP-ng
XCP-ng is an open-source virtualisation hypervisor released in 2008 based on XenServer. Like VMWare, XCP-ng comes with an Orchestrator called Xen Orchestra that will be used to manage the virtual machines on the different XCP-ng machines.
How to install it
The XCP-NG hypervisor can be install with a usb drive or a DVD but, it can also be installed remotely with PXE (Preboot Execution Environment) and the installation process can also be automated with an answerfile.
To have a install process that I can start whenever I have a problem with my XCP-ng server, I chose to use the PXE and answerfile installation configuration.
But for this to work, you need to have multiple servers:
- For PXE you need :
- A DHCP server that will tell the client computer where the PXE server is
- A TFTP server to give the bootable image to the client machine (the grub) and host the installation files
- For the answerfile you need:
- A HTTP server to host the file.
For all these servers/services, I created a VM using Vagrant, Vmware workstation and Ansible to configure the servers on the VM.
The full project is accessible GitHub here
Requirements
For this project, I needed to install the following programs:
- Vagrant
- Vagrant plugin vagrant-vmware-desktop
- VMWare workstation (or Fusion)
- Ansible( on MacOS use
brew install ansible)
Configuration
Vagrant
To configure Vagrant, I create the folowing ‘Vagrantfile’:
server_ip="192.168.1.20"
bridge_interface="en0"

Vagrant.configure("2") do |config|
  config.vm.define "server" do |server|
    server.vm.box = "gyptazy/ubuntu22.04-arm64"
    server.vm.network "public_network", bridge: bridge_interface, ip: server_ip
    server.vm.provider "vmware_desktop"

    server.vm.provision :ansible do |ansible|
      ansible.playbook = "playbook.yml"
      ansible.extra_vars = {
        server_ip: server_ip
      }
    end
  end
end
In the first part of the file, there are two variables:
- The IP address that the VM will take on the local network
- The network interface that the VM will take on the machine which it runs These variables were created to make it easier to change the configuration to reflect the network and PC setup of other people.
The rest of the file defies the VM that Vagrant creates:
- Use the image “gyptazy/ubuntu22.04-arm64” as the OS
- Connect the VM to the public_network (the host network) and use the physical network interface and the ip address defined
- Use the provider “vmware_desktop” to build the VM
- Then, use Ansibe to provision the VM with th playbook named “playbook.yml” and the variable of the VM ip address
Ansible
I configured Ansible by creating a playbook.yml file and role folders for all the different services I needed to install and, a XCP-ng role to automatically download the ISO image to push to the client host.
The playbook:
- hosts: all
roles:
	- role: dhcp
	- role: tftp
	- role: http
	- role: xcp-ng
The roles:
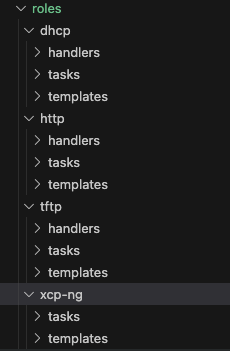
For each role I created 2 or 3 folders:
The handlers folder : where I created a restart task to reboot the service once installed and configured
Example of the main.yml file in the dhcp/handlers folder:
---
- name: restart dhcp
  systemd:
    name: isc-dhcp-server
    state: restarted
    daemon_reload: yes
    enabled: yes
The tasks folder: where I defined the commands that need to be executed to install the service
Example of the main.yml file in the dhcp/tasks folder:
---
- name: install isc-dhcp-server
  apt:
    name: isc-dhcp-server
    state: present

- name: configure isc-dhcp-server interface
  template:
    src: isc-dhcp-server
    dest: /etc/default/
  notify: restart dhcp

- name: configure dhcpd.conf
  template:
    src: dhcpd.conf
    dest: /etc/dhcp/
  notify: restart dhcp
And a templates folder where I defined all the services configuration files (embedded with variables for DHCP and XCP-ng files)
Example of the dhcpd.conf file in the dhcp/templates folder:
subnet 192.168.1.0 netmask 255.255.255.0 {
  range 192.168.1.150 192.168.1.200;
  option routers 192.168.1.1;
  option domain-name-servers 8.8.8.8;
  default-lease-time 600; max-lease-time 7200;
  next-server {{server_ip}};
  filename "/EFI/xenserver/grubx64.efi";
  }
For the XCP-ng role I created the tasks needed to download and configure the PXE grub and the answerfile
Answerfile:
<?xml version="1.0"?>
    <installation srtype="ext">
        <primary-disk>nvme0n1</primary-disk>
        <keymap>fr</keymap>
        <admin-interface name="eth0" proto="dhcp" />
        <name-server>8.8.8.8</name-server>
        <root-password>ty7YzK2wzb2N</root-password>
        <timezone>Europe/Paris</timezone>
        <source type="url">http://mirrors.xcp-ng.org/netinstall/8.3/</source>
    </installation>
This answerfile defines all the parameters needed for installing XCP-NG
Use the program
To execute the the program after downloading it from Github and installing the requirements, you only need to go in the project folder and execute the command:
vagrant up
After the VM has finished it’s configuraton, you need to start the client PC, go in the BIOS, and enable UEFI PXE Support and set the 1st Boot device on UEFI PXE (you will probably need to check your manufacture BIOS setup as every BIOS configuration is different)
Elements to improve
The project worked well to automate my installation of XCP-ng remotely but, there are some elements to improve:
Use more variables for an easy personalised install : At the moment there are only variables for the VM ip address and the network bridge interface. There needs to be more variables to personalise the installation to other setups ( for example: the dhcp network definition)
Fix the answerfile admin-interface: The answerfile is configured to install the XCP-ng server using an IP address served by the network dhcp but should be a fixed IP address.